.

Thursday, March 31, 2011

Benefits And Construction of Raised Beds For Vegetable Gardening

For several years, I've grown a portion, if not all, of my vegetables in raised beds. It wasn't until I ran out of space trying to grow enough food for 8 people that I started planting directly into the ground for my tomatoes, potatoes, onions, and squash. But if volume is not an issue, consider some of the benefits of raised bed gardening.


• You can grow food in any location; soil conditions are no longer an issue.
• Compaction of soil is not as great and thus boxes are easier to work.
• Soil tends to drain better.
• Raised beds warm up a bit faster than the ground in spring allowing you to get a slight jump on the season.
• Season extenders are easier to install if needed.
• Weeds are less of an issue and easier to remove.
• Virtually eliminates gophers, moles, voles, etc.
• Water can be concentrated in a specific area.
• More produce productivity per square foot.
• Less bending over! (Or rather, not bending over as far.)
• Gardeners can create pleasing geometrical arrangements and designs with boxes.


By now you may be wondering if there are there any negatives to this because it sounds too good to be true. Yes, there are a few, but not many...


• Raised beds are an investment - typically about $100 per 4' x 6' box.
• Raised beds must be replaced periodically - beds made of redwood last about 10 years.
• Once in place and filled with soil, they are difficult to move (I wouldn't suggest it!).
• The soil must be amended regularly or it will become depleted of nutrients.
• If you need or desire to garden on a really large scale, boxes can seem a bit limiting.
• Some larger crops, such as potatoes, corn, and squash, can seem to take over a box if not well planned.


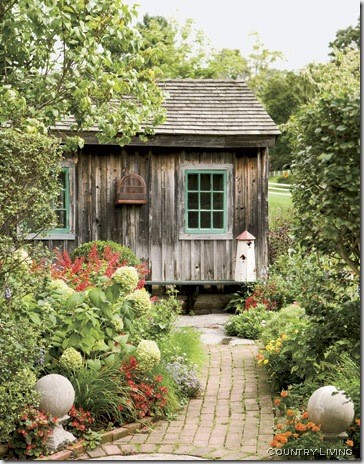
Early Spring Plantings


Despite a few minor negatives, raised bed gardening really is appealing. Years ago, I lived where the soil was rock hard - lots of clay. Planting anything required a jack hammer - literally! It was very discouraging gardening until I tried raised beds. At the time, I didn't research raised beds and I just had my husband build some wood frames about 6 inches high, stuck them where I wanted, filled them with dirt, and started gardening. And it worked! 


When we moved to our current homestead, I spent some time learning about what I really should be doing and found out that a 12 inch deep box was better. (Some of mine are actually 18 inches deep, but they don't work any better than my 12 inch deep boxes.) In order to defray some of the cost over time, I just add one or two new boxes each year. 
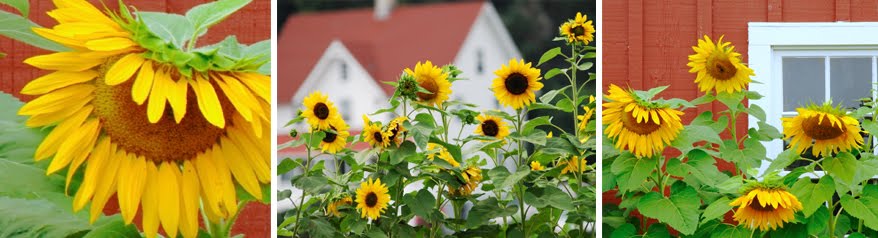

Early Summer Crops


Frost blanket protection from a light frost.


Making Raised Beds


Materials:


20 feet of redwood boards of 2" x 12"   
48 inches of redwood posts 4" x 4" (these can be smaller if you desire)
4' x 6.5' piece of chicken wire (or hardware cloth)
Wood screws
Staple Gun


Directions: 


Cut the 20' board down to two 6' lengths and two 4' lengths. Cut the redwood post into four 12" lengths. Assemble following pattern below and using wood screws to attach the longer boards to the square posts.


Your box will not be exactly 4' x 6' when you're done, but doing it this way reduces your costs a bit by purchase the least amount of wood and by having less waste due to extra cuts. So in the end, your box will be a little longer than 6' and a little narrower than 4'. And this is why your chicken wire needs to be at least 6 1/2 feet long.


Example of 1.5" x 1.5" corner supports.


Example of 4" x 4" corner supports.

Finally, attach the chicken wire to the bottom of the frame you have just made using your staple gun. Flip the box over and place it wherever you desire! If you're placing the boxes on a grass or a weed infested area, just lay down some newspaper first, then your box, and start filling it with gardening soil. The newspaper will kill the weeds and grass over time and then eventually compost into the soil underneath. 


Oh, and if you want to add irrigation, be sure to do so before you add your soil. Just go underneath the box with your pvc pipe and up through the chicken wire. I added a faucet to mine and I attach a soaker hose to it. 


 Q and A


Can you make the beds any size you want? Absolutely, but anything over 4 feet wide will make it difficult to reach the center when you want to weed, prune, or harvest.


What about length? Length isn't so much of an issue, but if you get the beds too long, the boards will need more support in the center to prevent them from bowing out. Eight feet is about the max you want to go.


You said you had 18 inch deep boxes. Isn't that better? Yes and no. Yes for root veggies, although they will work down through the wire on the 12" boxes if necessary, but when you make the 18" deep boxes, you'll have to use more than one board on the side going up. This not only costs more, but you lose water from between the boards; this is why I spend the money on the 12" boards instead of two 6" boards when making my boxes now.  (You can see from my photos I've tried both). The cons of the 18" deep outweigh the pros in this situation.


Can you use any kind of wood? Not if you want your boxes to last. You'll need a material that can stand up to rotting for as long as possible. Do not use treated lumber because it will leech chemicals into your soil and produce. Around here, it is common to pick up railroad ties for free, but they're treated with creosote and you don't want to have that in your beds. Redwood or cedar naturally resists bugs and will not rot quickly. If your boxes last 10 years, your annual cost should not exceed $10 per box. This is another reason why I staggered building mine; they shouldn't all need replacing at the same time and thus become cost prohibitive.


Do the corner supports have to be 4" square? No. They are extra sturdy like this, but it's not necessary. I've done different sizes. 


Sugar Snap Peas


Zucchini


Tomato Plants


What do you fill your boxes with? I have done this two ways. I've used a bagged organic potting soil that I purchased from a local nursery and I've also done the lasagna method right in the box where I layer some potting soil, amendments, some dirt from my yard, and compost. Sometimes I till it in and other times, I just layer it up. Both seem to work. And at the end of the season, when I let my chickens into the garden, they till it all up for me again!


There are so many great things to say about raised beds, so I think this topic deserves some more posts. And perhaps in the fall when I have some more photos and I've worked on my season extenders, I can show you some of that, too. A little at a time, right? Today is the first warm day outside and I can hardly wait for the weekend to get out there and get some stuff done! Pray the weather holds!


Have you gardened with raised beds? Please share any tips you can add!


Wednesday, March 30, 2011

Give Away: Home Dairy!

I'm so excited! I get to offer another Ashley English book for a give-away...  Home Dairy! The timing of this couldn't be better for me since I'm taking Wardeh's GNOWFGLINS™ Cultured Dairy eCourse and I've been in the thick of learning how to culture my own home dairy products. Having Ashley's book reinforces all that I'm learning.


My goal here isn't really to compare the two, but let me just say that Wardeh and Ashley each emphasizes different things and their methods vary somewhat. But that makes it all the more exciting, right? There's more than one way to skin a ... well, you get the point.


Whenever I consider a new book, I usually scan the back cover, read a little about the author, and then head for the table of contents so I have an idea of the topics the writer is covering. Here's a peak the Table of Contents for Home Dairy so you can see for yourself...


Ashley English
1. Creamery Origins 
2. Ingredients (includes types of cultures and bacteria)
3. Equipment (tools)
4. Butter and Ghee
5. Cultured Dairy
6. Cheese (13 kinds plus instructions for a homemade cheese press)
7. Ice Cream
8. Recipes
9. Body Care (recipes for personal care products using dairy)


Once again, Ashley's signature organizational skills make this book pleasing to pick up and read. The photos are fairly comprehensive so you get a good idea of what you should be doing in each step, particularly for the cheese and whipped butter. And in all, there are over 40 recipes and 7 profiles of dairy hobbyist. 


Interested yet? I thought so. Whether your a rural or an urban homesteader, making your own cheese, yogurt, and butter would be divine! Now if we all could just get some raw milk, we'd be set.


Enter The Give-Away


Sterling Publishing Company is kindly offering a Homestead Revival™ reader the opportunity to win a copy of Home Dairy by Ashley English

To enter...

• Leave a comment telling me if you make any dairy products at home or why you would like to learn (Please leave an email address if you do not have a blog so I can contact you if you are the winner.)

• Enter again by blogging, tweeting, or facebook this give-away to your readers and friends. You must link to Homestead Revival™ and leave a comment telling me you've done so. (Please leave a separate comment for each or it will only count once!)

This give-away ends Friday, April 1, 2011 at 11:59 p.m. PST!

This give-away has ended. Please watch for a new give-away next week!

Be sure to visit Ashley at her blog, Small Measure!


Tuesday, March 29, 2011

Momo Made It Aprons!

I've been looking at the aprons at Joan's "Momo's Retro Fashions" for quite a while, drooling over the gorgeous fabrics, beautiful styles, and excellent craftsmanship. Not sure why I kept putting off making a purchase because an apron is like an essential mom uniform to me. It energizes my spirit and gets me moving! Anyway, this week, I finally gave myself permission to make the purchase. I don't know if it was the two weeks of rainy weather or the green grass and daffodils coming up everywhere that announced spring was here, but something made me feel like a fresh apron was in order - ASAP!


Before I could blink an eye, it arrived in the mail! And inside, such a lovely presentation... kind of made me feel like a domestic queen!


Beautiful! I love this fabric...


That card on the far right is a recipe for Whipping Cream Pound Cake. Looking at the ingredients it reminds me of the old pound cake recipes like my great-grandmother use to make... probably tastes like heaven and will add a few pounds to my hips!


I think the fact that Joan's uses fabrics that are fresh and modern looking but with a nod to the past, is what gives her aprons that special touch I was looking for. I wanted something kind of vintage or retro, but I didn't want to look like I was wearing my grandmother's apron, either. Check out some of these other cute styles and fabrics...


Can you tell I had trouble choosing one? I may have to get another one later in the summer! If you want to see more, you're going to need to go over to her etsy store and drool over there for a while!


And you know another thing I'm going to love about my new apron? Since it's made out of 100 percent cotton, the more I wash it, the better it's going to get! Soft and comfy, just like grandmother's. But this time it will be mine!

Monday, March 28, 2011

Barn Hop #6

It's Monday, and around here, we Barn Hop to start our week off! It's a chance to share what's going on in our part of the world, things we're learning, and ideas we're dreaming! And by linking up, we connect with other kindred spirits and cultivate the Homestead Community.


Your hosts for the Homestead Barn Hop are...


Jill @ The Prairie Homestead
Kendra @ New Life on a Homestead
Megan @ A Blossoming Homestead
and Me!


This week and next I'm spending some time reorganizing some problem areas at my homestead. Because of some changes in our homeschooling (kids growing up and being more and more independent on their work), I decided to shift the classroom from upstairs where we use to spend the day, to a downstairs room. We fondly call it the "library", but until this week, it had zero books in it. Let's just say that it was suppose to be a family library, but ended up being an unfinished music room and study area for my husband. I took some photos going all the way around the room so you could get an idea of what I did. Keep in mind this was a no-cost redo so it's not perfect, but it was free!


I love this room because it's on the front of the house and has several windows which make it bright and airy, especially after I recently painted it a soft white color. By moving the classroom to this room right off the entryway and great room, I can easily move from working with the kids to the kitchen area and back. I'll be able to monitor their independent work or step in to teach a subject at the appropriate time. 


Another reason for moving the classroom downstairs is so that we can use the woodstove to stay warm instead of running the upstairs heater. Next winter, this should really save us a lot of money! And every bit adds up!


This past week I also took a long hard look at how we were doing chores around here, especially cooking and washing dishes, and decided that a change was in order. Somehow we had slipped from our usual clearly defined assignments to an uncharacteristic chaos of "it's not my chore" and a poor attitude to go with it. The truth of the matter... as the Mom, I let things slide...


• not clearly assigning chores
• not being specific in what I wanted or expected
• not following up well to determine if things were done correctly
• not initiating the proper consequences


How's that for dropping the ball? Happens to the best of us from time to time. So, we had to regroup and start fresh. I spent a good part of the week thinking about it and I made some decisions...


• I listed chores that had to be done every day
• I added several new daily chores to the list; things that needed to be done more often
• I listed chores that had to be done once a week 
• I divided the house into 5 zones; each day we clean a different zone
• We started having breakfast all together at one time 
• We began having devotions twice a day instead of once (breakfast time was now added)
• Now we will all cook together and we will all clean the kitchen together
• No more dishwasher; we are washing by hand, drying, and putting things away (this is more of a necessity because the washer is giving out, but I decided we would not replace it.)
• Each daughter will have a meal where she washes, one where she dries, and one where she puts things away, does floors, cabinets, etc.
• No iPod during chores anymore - even if it's something profitable, like listening to a classic. (Children were getting too distracted and not doing a good job).  


Whew! Big changes around here. But you know what? They actually seem happier! No, it's not Disneyland happy, but we're out of the kitchen faster and they aren't alone doing a big chore. And we're bonding more as a family. I like that and so do they. 


My new chore list? You guessed it; it includes checking on little people chores. Pray I set a good example and complete this one!


This week, I hope to set up a sewing area and get my seeds all organized! 


So, tell us what's happening in your neck of the woods!


Sunday, March 27, 2011

Sunday Blessing


Older women likewise are to be 
reverent in their behavior, 
not malicious gossips 
nor enslaved to much wine, 
teaching what is good,

Photo Credit

so that they may encourage the young women 
to love their husbands, 
to love their children, 
to be sensible, 
pure, 
workers at home, 
kind, 
being subject to their own husbands, 
so that the word of God 
will not be dishonored.
~Titus 2: 3-5

There really is joy to be found in serving God, no matter where He has called us! But especially for those of us he has called to the home! What a privilege.


Saturday, March 26, 2011

Winner: Pioneer Drying Rack!

What a wonderful response to the Homestead Drying Rack from Daniel and Abby! I know you have all blessed them with your kind and gracious responses. Thank you! I hope you'll keep them in mind when the time and finances allow for you to make a purchase in the future. I think this would make an awesome item to add to your home to be prepared for doing laundry without electricity, don't you think?


The fortunate winner of the Pioneer model is...


Rad Surfing Mom!


Congratulations, Rad Surfing Mom! Please contact me via email so I can pass your info on to Daniel and Abby so they can get the drying rack on it's way to you! Enjoy your new rack!


Don't forget the Preparedness Challenge! You'll find the post just below this one.


Preparedness Challenge #2

I can't tell you how thrilled I was to see so many participate in the first Preparedness Challenge! Way to go, everyone! I've had so many thoughts on this all week, I don't even know where to begin.


First, I want to say what you probably already know... Preparedness is a lifestyle, not an event. It's a decision to live prepared on an ongoing basis. It would be so American of us to believe we can just go out and purchase a preparedness "kit" and be done, wouldn't it? Yeah, I'd get it, too, but it just isn't that simple, is it?


Food stores will need to be used and rotated, water will need to be replaced, medications will expire, and wood will be burned up each winter. Things will constantly need to be replenished and procured.


Second, by getting into the habit of preparing, we will have less gaps over time, be able to take advantage of good sales, and at least have the basics tucked away to hold our own for a  period of time. And while help may or may not come, having at least a few weeks worth of food (at the minimum) can make a huge difference!


I just happened to catch an episode of Glenn Beck this week where he listed a few things we could do to be proactive for the coming collapse (at least I believe that's how he put it). What caught my attention the most? When he mentioned that during a crisis where food, water, and shelter are absent, fear sets in and people don't make rational decisions. However, if they have just these three basic things, they are able to remain somewhat calm and make better decisions. By being prepared, you're giving yourself time to think clearly in a crisis situation. And that could be life saving! 


Third, I received an email from a friend who is a missionary in Japan. To get a realistic non-news story idea of what it's like there, I thought I'd share some portions of their letter...


"The team's location... is approximately an hour and half drive north of Tokyo.... the whole northeastern region of Japan... is without any means of heat for their homes or for food preparation. Many of the oil refineries in Northern Japan have been shut down since the earthquake making propane, butane, and kerosene unavailable. Gasoline rationing has also begun in many cities. As a result, everyday supplies are in want due to the disruption of normal delivery of goods and damaged roads... they do not have internet access... they do have cell phone service there thankfully."


Perhaps here this information from someone on the ground will help you this week as you think through your own preparations for an emergency situation.


Photo Credit


Finally, on another note, I had a reader ask a great question this week regarding preparedness. Basically, she wanted to know if I had $100 and was just starting to get prepared, what would I use that money on? This particular reader had some limitations on her $100 because it was in the form of a gift card from a certain retailer, but it got me to thinking... where would I begin if I had $100?


While I feel that having a minimum of 3 months of food is crucial, I would rather build this up by picking up a few extra items each time I go to the grocery store. In fact, one thing you might consider doing this week is to purchase enough ingredients to make two of the same meal instead of just enough to make one. For example, if you're going to make spaghetti, pick up an extra jar of sauce, an extra package of pasta, and anything else you might need. Cook one and add the other to your food storage.


But back to the $100. It's not that often that we have a large chunk of change to spend on a single item. What would you use it on? 


My top pick would be to purchase something that I could use now and in the event of a crisis... 


• A garden is a fabulous way to be prepared long term, especially if you work toward year 'round growing of produce. What tools do you need to get that going? I recently purchased a non-gas powered tiller to help me work in the garden. This can be used now and even if I can't afford gas or it isn't available. (And there is little to go wrong with it!) Other items could include a cold frame, seed house, or mini greenhouse for extending the harvest.


• Do you have a water bath canner or a pressure canner? I think either of these would be an excellent preparedness choice. 


• How about a proper set of knives (dont' forget the hunting knife) and a honing steel? I've used dull knives for way to long and it's amazing how much more efficiently I can work when I have a proper edge on my knives!


• A rain barrel would be great for additional water storage. You can use it right away for watering pot plants or for cleaning in an emergency.


• Having a library of books to help you plan and prepare now or in the event of an electrical outage is a great idea. Reading what others have learned over the years might save you a ton of money and headache in the long run!


• Consider purchasing an extra large gas can for extra gas (instead of the small kind that holds only 2 gallons), a couple of back up propane tanks for a cook stove, or some extra firewood!


There are a lot more ideas out there, but these should get you started if you find yourself in a similar situation. And be sure to read through some of my posts on Preparedness (see right sidebar). 


How I Prepared This Week!


Wilderness Family Naturals
This week, for the Preparedness Challenge, I purchased a one gallon size of coconut oil (so many uses!), bought lots more seeds for sprouting fresh greens (good for nutrients in winter!), an extra set of sprouting lids, and more beans! I also researched and learned how to make lye from ash, consulted a ton of recipes for making soap, and will pick up some final supplies to make my first batch of soap today when I go to town. I would have made the soap this week, but weather kept being an issue for our homesteading group to meet


The Sprout People

The Sprout People


This challenge is sooo good for me! It has me thinking all week on what I'm going to do for the next challenge and that's exactly what I needed to keep me moving on it! How's it working for you? 


Want to share what you did this week to meet the Preparedness Challenge? No requirements, just finish the sentence below and leave a comment or write a post and connect up with the Linky below! (Don't forget to add the picture above!)...


"This week, for the Preparedness Challenge, I _____________________..."


I going to close with this thought from Michelle at Give A Girl A Fig. She wrote on her preparedness challenge this week, "We're not fretting or frantic here. Just acting on that sense of 'calm urgency'.


Friday, March 25, 2011

More Coops To Love!

My heart swoons for beautiful chicken coops. And although the Hen Hilton is built, it's not quite "finished". So I'm always looking at photos for a little inspiration...

The picket fence it this is darling, but... my girls would fly right over and I don't want to clip their wings. Love that vine and the dainty sized windows!


Red is always a favorite and I love metal roofing!


Definitely has garden charm.


This coop is close to mine on color, and I really like the shrubs in the area.


Oh, the shutters and screen door. And boxwoods! I love boxwoods! Planning to add some to my area for sure!


Hmmm... window boxes, good. Dog? Is he there for keeping them in or out?


I don't know; it's just cute!


Wow... wow. I think it's the crown molding and all those sunflowers and zinnias that send it over the top. Could be the copula.


Charming, charming, charming. Just like a miniature little cottage!


The rustic siding and green windows are probably more my style. Love the pathway up to the coop. I'm planning on a pathway of crushed granite up to mine.


This makes me think of a secret cottage; a place of it's own. As a kid, I'd be all over this one!


Smart on style and structure. And neat as a pin! I'm thinking shutters, maybe?


Oh, this one!! Simple and yet so very charming. (How many times have I used that word in this post so far? Anyone counting?) I love that it's all one color except for the roof. I wonder what the Hen Hilton would look like with an apron around the facia like that? I guess I'm going to have to pick and choose.


And my all time favorite? It still hasn't changed. I adore these roses cascading over the side of this coop! I just picked up a yellow Lady Banks Rose for the Hen Hilton. Now I just need one other climbing variety (preferably a white rose) that will flower all summer so I can mix it in and have beautiful blossoms from spring right on through summer. Any suggestions?


Did you now that if you live in Houston, Texas you can have up to 7 chickens on your property if you have a permit? You won't believe what is required for that permit. No, you'll never guess, so I'll tell you...

You need a doctor's order stating that you need to eat fresh chicken eggs. Yep. I really read that.

{Smile.}
                                                                                              *All photos courtesy of Pinterest!


LinkWithin

Related Posts with Thumbnails