.

Friday, March 29, 2013

Kale & Cabbage Salad

This is not your mother's salad.


As much as we hate to admit it, most of us know really don’t eat enough vegetables. Well, most of the time anyway. When produce is coming out of the garden about mid summer, it may be another story, but what about the rest of the year?

For one thing, I know I need to eat more greens. My doctor recently advised me to stop taking calcium supplements, stating it actually did more damage to the heart than it did repairing bones. Seriously? Ughhh....

Common sense is starting to kick in, albeit a little slow. I realize now that it’s best to consume the entire plant as opposed to extracting and isolating individual components in it. As a whole food advocate, I’ve made it a practice to cook and serve foods from scratch, eating them as close to the way God made them as possible. But somehow I still thought it was okay to take those vitamins without question. I realize sometimes it is absolutely necessary, but most of the time, we'd be better off "taking our vitamins" through the foods we consume. Even though they may be less nutrient dense than years ago, they are still our best means for absorbing what is needed and flushing out what is not. 


So all that said... I'm on a mission to eat more veggies, particularly greens. I grew two varieties of kale this winter (Winter Red and Dinosaur), as well as Rainbow Chard, with the hopes of eating more during the dark months of mostly root vegetables and squash. And I did eat more than all the years prior! Just not as much as I had hoped. Most days I added a few leaves (along with some purchased spinach leaves) to smoothies and made a green drink. No juicing or cooking, just pureed in the blender along with the other ingredients.


I also was more consist about sprouting seeds and adding them to everything from salads to egg dishes, sandwiches, and anything else that sounded half way appetizing.

Then I found this kale cabbage mix at Costco and I got all excited until I realized it included a dressing I wasn't thrilled with. And why buy what I'm mostly growing? So I came home and made my own version substituting sprouts and green onions for chicory and making a homemade poppyseed dressing from ingredients I "approve".

Kale & Cabbage Salad
(no measurements are given as this is totally up to you and how many servings you want!)

kale leaves, cut into shreds
purple cabbage, cut into shreds
napa cabbage, cut into shreds
baby spinach leaves
broccoli florets, cut into bite size pieces
brussels sprouts, cut into thin strips
green sprouts
green onions, chopped
dried cranberries
pumpkin seeds

Toss all greens and then top with sprouts, onions cranberries, and pumpkin seeds.


And for the dressing...


Poppy Seed Dressing

1/2 cup olive oil
3 T. apple cider vinegar
2 T. lemon juice (sometimes I substitute lime)
2 T. dijon mustard
2 T. honey
2 T. poppy seeds
1/2 tsp. minced onion or onion powder
1/4 tsp. sea salt

Blend well by shaking in a jar and allow to sit for about 1/2 hour for flavors to blend. It's best to make it before you begin your salad and periodically give it a good shake. (At least it makes me feel like the flavors are converging that way.)

I'd love to hear some feedback on how you like this "recipe" and how you're incorporating greens into your diet.


This post was linked to Carole's Chatter: Food on Friday

Saturday, March 23, 2013

Ginger Spice Decoction

I purposefully have delayed writing this post simply because I was so excited about it.

Huh?

Yeah... because it seemed too good to be true. A friend shared the recipe with me and RAVED about it for half an hour, expounding on the benefits and how it had helped her family...

I've heard lots of stories like this one. Haven't you? I politely tucked the recipe in my purse and eventually put it somewhere on my desk where it sat for months.

Then there was that day during the bleak part of winter, early in January when I was feeling blah, cold to the bone, tired, and my digestive system was irritated beyond belief from all the holiday foods I had enjoyed for their "momentary pleasures". What could it hurt to try her brew? After all, it was just normal kitchen stuff I had on hand.


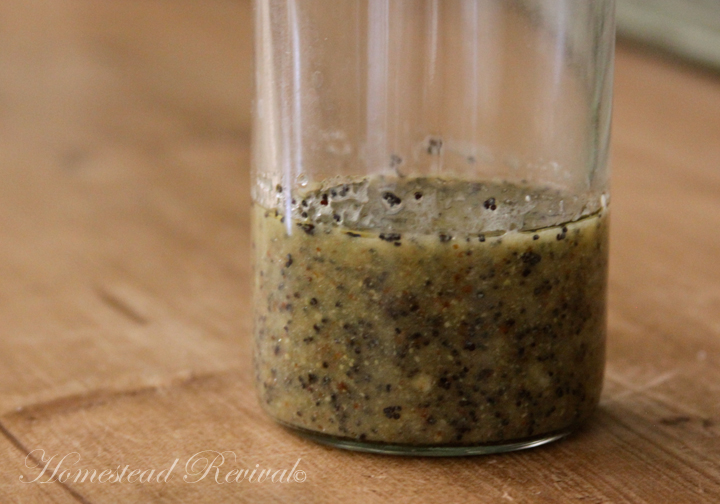
I made a batch and took my first sip...

Hmmm... it burned a bit going down. My esophagus was definitely inflamed. Sigh...

The second sip was a bit better and soon I had finished the cup of "tea". And it tasted really pretty good. I admit... I was surprised. Especially since I don't like ginger tea all that much. Love ginger ale; hate ginger tea. Go figure.

Anyway, by mid afternoon, I kind of wanted more, so I had a second cup. By this time, I'm thinking to myself "This stuff is pretty good!". But the real surprise came that night.

You see, I have had trouble swallowing for six years... any time I lay down or bend over. Hiatal hernia. Confirmed with an endoscopy. No doubt about it. The doctor's solution? Prescription and antacids for the rest of my life. NOT what I wanted to hear. And after reading books on the subject, I wasn't sure I WANTED to take them for an extended period of time. (Please know I'm well aware of the seriousness of acid on the esophagus... Barrett's Disease, cancer. Definitely bad stuff.)

I do NOT know how to explain this, but that night, when I laid down, I actually was able to swallow for the first time in YEARS! I tried not to get too excited. Just a fluke I thought. But three days later, I'm running "tests" on myself... bend over, stand up, swallow. I can do it!! Now bend over, swallow, THEN stand up... I can still do it!! I literally broke down and cried.

I honestly can not fully explain this, but in researching each of the ingredients, I found that they ALL help with digestive issues (besides other things). Now I realize I still have a Hiatal Hernia and it hasn't gone away, but I'm assuming the decoction has benefited me by allowing my gut to process food quicker and more thoroughly. But it does even more.

The bay leaves, cinnamon, and cloves also have tannins that give it astringent qualities which tighten, heal, and have a drying effect and thus reduce irritation and inflammation (like in my esophagus). Typically with acid reflux you want to AVOID tannins, but for some reason, these spices seem to be reducing some of the inflammation without causing the irritation that I've experienced from other non-conventional remedies. And it also seems to work a lot better than the prescriptions, which only kept it from being totally out of control.

Even though I had been tested for H. Pylori, twice... the tests were always negative. Since this decoction seems to have worked on my system so well, I'm guessing I must have been borderline for the bacteria. Apparently the cinnamon acts against H. Pylori and helps counter stomach ulcers that result from the bacteria.
  

You may be thinking, "I don't have acid reflux, so this won't benefit me. Well, the gal that shared it with me didn't have an acid reflux problem either. It benefited her in other ways. After a while, her skin cleared up and she lost weight. Lots of weight! And she didn't change anything else in her diet (according to her testimony). She also felt it had helped her husband during his recovery from cancer and the treatment he underwent.

If you do your own research, you'll find that these spices may help with various aliments such as colds, flu, infection, coughs, ulcers, nausea, indigestion, gas, bloating, gastroenteritis, diarrhea, infection, IBS,  toothaches (oh, it helped me with that, too), poor circulation, and inflammation. And I suspect it does more that we don't realize. Besides... this just tastes good and all the ingredients are safe to consume. (If you have any health issues, take the recipe to your doctor and ask if he/she feels it would be a problem for you to consume the decoction.)

So enough background on it. Let's talk about the recipe!

Ginger Spice Decoction

40 whole cloves
20 bay leaves (MUST be Laurus nobilis - any others are not considered safe to consume)
2 cinnamon sticks (about 3-4 inches long each)
1 ginger root (about 4-5 inches long - longer if thin, shorter if fat)
4-5 quarts water


Just a word about the ginger. I mentioned it should be about 4 inches long. This is not an EXACT recipe. If you find the ginger is too strong, cut back. I was using about twice this amount and it may have been too much for my intestines. So I cut back on the amount I put in the pot. Once I tried a 3rd stick of cinnamon and it overwhelmed the drink with cinnamon flavor to the point of being unappealing, so I would stick to just the two sticks.


Also, make sure you use fresh ginger that is in good condition.


Not moldy like in the photo below. I buy just a little at a time so it doesn't go bad on me.


Place all ingredients along with the water in a crock pot that doesn't get too hot. I found the Rival crock pots cook higher on the "low" setting as opposed to the Hamilton Beach, which I picked up for around $20 and dedicated to just making this decoction and other herbal brews. I can also strain the ingredients and keep them on warm instead of cooking constantly.


Let the brew cook on low for several hours. I typically make it before I go to bed and it's ready the next morning, but occasionally I'll make a batch in the morning and it's ready by late afternoon or early evening.

Leave the ingredients in the pot to continue brewing and take out what you plan to drink. Add the same amount of water BACK into the pot so that it replenishes the liquid to the original level. Continue this for a couple of days and then strain and discard the ingredients, leaving just the liquid. At this point, I tend to leave it on warm and use as needed, but I don't continue to add water into the pot since it would dilute it.

The decoction may be taken hot or cold, but being that it's winter right now, I tend to drink it hot along with a bit of honey. I also like to dilute it further with some hot water, however, my husband drinks it straight from the crock pot. He LOVES ginger and likes it really strong. I figure this summer, we'll try adding some ice to chill it. Might be good on a hot day while gardening.


As you can see from my photo below, I keep this brewing on top of my mini-refrigerator so that it's out of the way. A ladle and honey makes it easy to grab a cup throughout the day.


Because I'm making this every few days, I purchased the ingredients in bulk from Azure Standard. It cost me about $25 for all three ingredients (minus the ginger root) and it makes a ton of decoction! I've lost count of how many pots I've already made. You could also find the ingredients through any reputable bulk herb supplier such as Mountain Rose Herbs or Bulk Herb Store.

I can't tell you how excited I've been over using herbs and other plants. I'm truly amazed at what I'm learning and how well they work. It encourages me to try even more!

I'd love to hear what decoctions you've experimented with, how it has helped you, and any recipes! Feel free to include a link to your recipe as well. 

Please note: I am not a medical professional nor certified in herbal remedies. My post only reflects my own experience and is not a guarantee or promise of results in any way. Herbs are powerful and should be treated with respect, so please do your own research and seek professional medical advice if you have any health concerns.


Thursday, March 14, 2013

The Pantry Fridge... A Very "Mini" Tour

On my last post I showed you a picture of my pantry refrigerator; a dorm size ice box with a mini freezer inside. I actually purchased this last year when our kitchen fridge broke down and was out of commission for over 4 weeks during the summer. We were very blessed that it happened when the produce was actually coming out of the garden and we soon realized our only need at the time was a cold space for the goat milk. (Seriously, I was considering ditching the big fridge altogether and go totally "off grid" as I was so completely frustrated trying to get it fixed at a reasonable price, but that's another story for different day).

But back to the little fridge...


I had to keep the milk cool, so I picked up the small dorm size ice box thinking I could resell it if necessary once the big fridge was repaired. Instead, I found it was just right for all the new endeavors I had embarked upon in the last year or so. Cultures, rennets, herbs, seeds... just to name a few. Things that were taking up so much space in the main refrigerator... Okay, so perhaps I don't REALLY want to chuck the electricity completely. Not yet, anyway. There just really isn't a viable alternative to refrigeration for us at this particular time.)

So if I am going to keep most of these things in my all-to-warm pantry, the dorm size ice box seems to be the ticket for keeping them both dark and cool, which is what most of the items must have in order to stay fresh. It frees up space in the kitchen where I keep the fresh food and allows me to group things together based on use. Here's a little tour of what I keep in the smaller unit...

• Seeds

All my seeds are organized in two containers that fit nicely in the back of the shelves. This helps preserve their integrity so that the majority of them sprout the next season.


• Cultures

Any kind of culture starter is kept in the bottom drawer until I'm ready to use it, whether it's for sourdough or kefir or anything in between. I can also store my starters that are "resting" in this fridge.


• Pectin

I use natural pectin and sometimes I don't use the entire packet. Either way, I always keep it in the refrigerator just to keep it from getting too hot. The Pomona's Pectin requires you to make a calcium water mix, so this can go in here, too. It's nice to keep it separate since family members may mistake it for something else if I don't write on the jar what it's for. They don't venture in this fridge much (if ever), so things are kind of protected in here.

• Rennets

All those little bottles of rennet for cheesemaking... they go in here, too. I TRY to remember to write the expiration date on top so that I can keep an eye for when I need to replace it.


• Yeasts

I'm hoping to move away from conventional yeast altogether, but occasionally we are still using it. So I keep that on hand as well.

• Ginger Ale

I don't get sick too often, but I do occasionally get an upset stomach. And it's always around 2 a.m. To keep my husband from having to make a late night run to the store, I keep non-alcoholic ginger ale (a.k.a. ginger beer) on hand to settle my stomach. This particular brand (Reed's) is a natural ale that really does the trick (has an extra strong ginger flavor due to it's real ginger ingredients) and I'm not getting a lot of the bad stuff with the good. They actually make a "Nausea Relief" brew and a Kombucha, but I haven't found either locally yet.


• Herbal Remedies

This is a biggie... I have all my herbal mixes in here. Like the seeds, they need a cool, dark location and this makes it particularly quick for making up the daily doses for the animals (and humans!). As you can see in the top photo, the jars are starting to take over (I have even more since these pictures were taken!)... I hope I don't out grow this space soon!


• Probios

Probios is my "go to" item of choice for any animal with just about any medical need.... it's basically probiotics for the goats, chickens, etc. It just gives them that needed boost, so I keep it on had at all times, although I usually give herbal remedies in conjunction with it.


• Ice Packs

Having an ice pack ready to go is always helpful. You never know when you'll need one. Plus, I usually have a friend do my goat's blood draws for annual testing, so I use these for shipping blood samples.

So there you have it... the mini tour of the Pantry Fridge. If we ever get the barn built, I'm sure we'll move this out to the milking area so all the herbs are on hand for dosing where we need it, not to mention, I can chill the milk if I need to stay in the barn longer, tending to needs out there. Of course, the seeds, cultures, and starters will have to find a new home at that point, but this solution works really well for the time being.

I suspect there's a lot of dorm refrigerators out there just sitting in garages taking up space... perhaps a few of them can find a new life in the pantry?

How do you store your herbal remedies, cultures, and such? Is anyone blessed with a root cellar and if so, how does it work for these kinds of things?


Saturday, March 9, 2013

How To Give Herbal Remedies To Goats... Easily!

At Sweetwater Farm, the goats are treated both proactively and medicinally with herbs rather than conventional drugs. Most of the time I use herbal mixes from Fir Meadows, but I've also successfully used Molly's Herbals. For specific information on what we do on a regular basis, you can read about it on my Sweetwater Farm site. The purpose of this post, however, is to talk about how to get your frisky caprines to easily take their medicine (so to speak!).

Goats can be pretty finicky. And stubborn, too! I needed a sure-fire method that would insure each goat got the right herbs, in the right amount. None of this business of spitting them out, eating another goats herbal treatment, etc.

I've read a lot of forums and websites with several ideas that would work, but with quite a bit of effort, requiring more time and energy than I have to devote to just one homesteading need.  But there IS an answer... after months of experimenting, I've found a ridiculously easy manner for encouraging most goats to eat their herbs as if you were giving them a really special treat. It's so easy in fact, you'll probably laugh and say "Seriously? Is that IT?"!

The reason that it took me so long to get to this simple solution is BECAUSE I HAD read so many forums and websites. I tried all their solutions before thinking it through logically. Most people suggest making "herb balls" where you add everything from olive oil, peanut butter, or molasses to the herbs and then roll it into a ball (a.k.a. a bolus). It's then either administered as a treat or given with a bolus gun (like a large syringe down the throat, but without a needle). Others make the herbs up into a tea and drench the goat (another method where it's given down the throat).

But because herbs are typically given twice a day for six days a week (with one day off to let the body rest), all this bolusing and drenching was WAY too much work for me. Besides, I really didn't sign up for daily goat wrestling when I started a herd!

Even if one made herb balls that the goats would WILLING eat... these took an incredible amount of time. So I tried making them up in advance and storing them in little glass containers in the refrigerator. For one week's worth of herb balls for three goats, it took me almost an hour and a half (although I confess it was probably due to the fact that I was frequently interrupted for Mom duties). Suffice it to say... this just wasn't going to work for me. I dreaded making new batches each week and often procrastinated which meant a day or two of missed herbs for the goats.

So it occurred to me I needed to find that one ingredient to add to the mix that was irresistible... a secret ingredient that would override their desire for anything else. For my goats, it was a pretty easy solution since they were always fighting over the kelp that I added to the mineral feeder. They would eat this WITHOUT FAIL and head butting often ensued as they tried to go for their herd mate's portion.

It also occurred to me that making balls wasn't really necessary if they were willing to eat it. I just needed a way for the herbs to "stick" to the kelp so they would eat both at the same time. At first I tried molasses, but this stuff is stickier than honey. And messier. I HATED getting it out twice a day and fighting it. Honey and peanut butter would work, but neither were cheap solutions, especially with the organic peanut butter recall at the time. The few times I did use these ingredients, I found it was just a mess.

FINALLY... I tried olive oil and the result was perfect! It was inexpensive and required only about 1/4 of a tsp. for each dose. And if I didn't get it on the sides of the bowl, it didn't make a mess. Because it held everything together so well, there wasn't a need to make it into balls either. Instead, I just added enough to keep it crumbly so I could add it to their ration on the milking stand.

So without further ado, here's a simple tutorial...

Serving Herbs to Goats

Add about 1/4 - 1/2 tsp. of olive oil to a small dish. How much oil you use will depend on how much herbs you're giving, so adjust accordingly.

Because different goats have different needs, I use a Sharpie to write the goats initial on the dish so I know who gets which serving. I also use a little tray, cookie sheet, or basket to carry all my dishes to my herb supply and out to the milking stand. It makes life so much easier!


Next add herbs...


And the all too irresistible kelp and stir.

Add a small portion of your goat stand ration, whatever that may be. I use oats, barley, BOSS (black oil sunflower seeds), and dairy pellets. Stir until combined.


Place dish in feeder on stand along with additional stand ration. If any goats are not "in milk" you can still have them step up on the stand for their daily serving or simply secure each goat to a mineral feeder until everyone has consumed their own serving. Molly Nolte does this at Fias Co Farms.


Note: Some goats, such as Symphony (pictured below), like to toss their bowl when they're all done and they get bored waiting for me to finish milking. Oh, well... haven't broken one yet, but you might keep that in mind.


I keep all my herbs in a small dorm size refrigerator in our walk in pantry (this could easily be kept in a barn, garage, shed, etc. if electricity is available). Later I'll do a post to give you a tour of this, but for now, you can see it keeps all my herbs fresh and easy to administer.


Most herbs come in plastic bags (and occasionally in mylar bags), so I transfer them to canning jars and cut the labels off the bags and tape them to the jar. I also highlight any info I want to remember as to dosing instructions, but I also add a measuring spoon that matches how much I want to administer on a regular basis. I pick these up at the local dollar store for almost nothing. Herbs are typically given by weight and since my goats are all roughly the same weight, I just add the correct measuring spoon to each jar. For example, if they all should get 1 tsp. of Kop-Sel (a copper and selenium herbal supplement), then I just add the 1 tsp. measure. This way anyone in the family who might need to make up a dish for the goats knows just to give whatever is in the jar. SO EASY!


So there you have it; herbs administered... EASILY. Now you can be "Mary Poppins" to your caprine friends, too!


Thursday, March 7, 2013

Bare Root Transplants

There's green fuzz popping up around our yard in spite of the incessant drizzle that threatens to freeze our bones. Spring is on its way and I am so happy to be back on our homestead in time before the green grass has come and gone. We are working on seedlings inside, but some plants are ready to go into the ground now. On the farm where I work, we are pruning back the berries and trellising this year’s bine, the long berry stalks that lie tangled in prickly bundles on the ground.


Early March is the right time to find your bare root plants. For raspberries, you can certainly purchase them on line or at a nursery, but before you do... see if your local organic farm has some  plants to share, or maybe friend's whose raspberries have weathered a couple seasons. The stronger the plant the better chance it has of taking root when transplanted.  You will want to harvest your bare root plants while it is still cold, so they are in the middle of their dormancy. Vernalization is the ability of a plant to flower because of a period of cold. If a plant is pruned or showing signs of new growth, you will jeopardize its longevity. It is important that you keep the plant cool until you plant it, so the process of vernalization does not start too soon.


At home we are transplanting some bare root raspberries from a friend's garden, just in time for a week of rain headed our way. The new plants will continue down one side of a fence line which will act as both a natural barrier and trellis, with blackberries on the other side. The tiny stalks need protection in the ground, insulation, and a nutritional source in order to help them settle into their spot. I started out with good chicken wire, potting soil, compost, and wood chips.

The holes should be about two feet apart so as to leave room for the plants to grow wider. Our dirt is in top condition under a layer of straw and newspaper which is still breaking down from last year, so without turning the soil; I simply dug a hole about one foot deep and just as wide. 

Since we have gophers and moles, I lined the hole with the chicken wire in both directions to act as a physical barrier to protect the roots. In order to ground the “basket” I put about half of the original dirt inside with a handful of compost and potting soil in order to give it a little staying power for the end of winter. We have a great supply of earthworms to aerate our soil, so I am positive it will keep getting better. 


I nestled the plant’s root system into about six inches of dirt and then filled the basket with the original dirt leaving just enough room at the top of the wire mesh to fold it into a ball shape. Part of the stem is covered, but this will not hurt the plant. It will lend more support which helps a lot in our windy little corner of the world. 


Next, I covered the rest of the hole with the original dirt along with some compost and an added layer of wood chips to hold in the warmth and moisture.  A good rain (which started just as I put the last plant in the ground) will help the compost and soil settle in around the little plants. 

Early spring can be a little tricky because of factors beyond our control... things that can devastate garden plans such as an unexpected late frost, excessive moisture, or a lack of rain altogether. I won’t know how these have settled in for several weeks, but I know I have given them the best start possible. Now the sun and rain must do their part. 


Saturday, March 2, 2013

Winner: Thy Hand Hath Provided Cookbook!

Thank you so much for a wonderful response to Jane Bryan's Cookbook giveaway! Sounds like a lot of us want more recipes from scratch and canning tips. For three blessed winners, they'll soon receive a copy in the mail...

Congratulations...
Lulu Banbullzull 
Kimmie Annie 
Melissa Tippie 

Please email me with your mailing address as soon as possible because I know you'll be excited to get your cookbook!

Don't forget... Wedding "season" is fast approaching and Jane's cookbook would make a lovely addition to a bridal shower gift. I'm thinking a cookbook with any of the following...

• pie plate and rolling pin
• water bath canning set
• salad bowl, salad tongs, salad spinner
• casserole dish and oven mitts
• cookie sheet, jelly roll pan, cookie scoop

You get the idea. Be creative and come up with your own combo gift. And why not keep a couple of extra copies on hand for last minute gifts? It's nice to have something ready in the wings. You can purchase her cookbook right HERE!

Happy cooking!


LinkWithin

Related Posts with Thumbnails